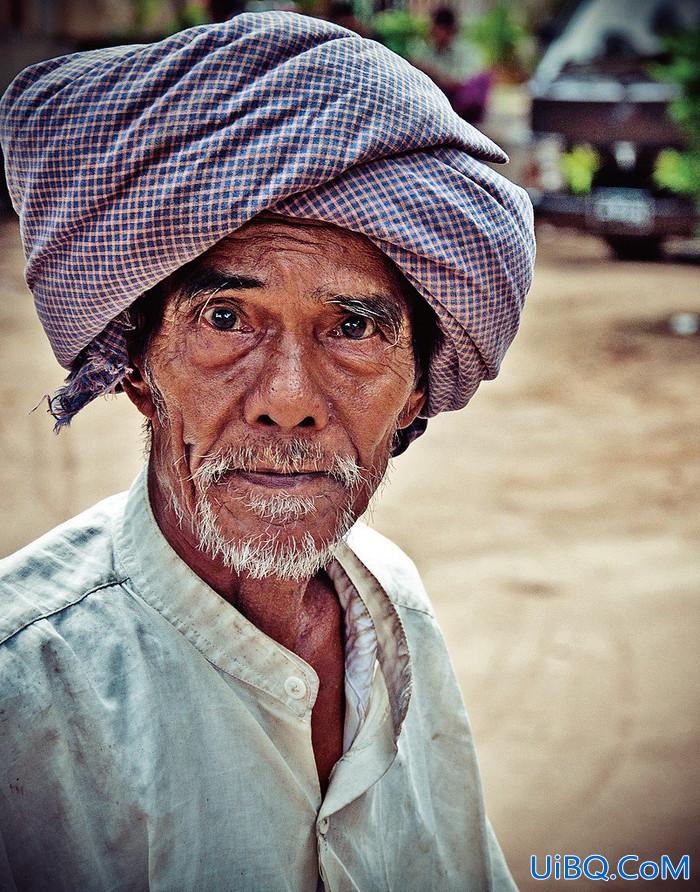
ps视觉冲击感的非主流照片教程本教程使用photoshop 9.0 原图 screen.width*0.7) {this.resized=true; this.width=screen.width*0.7; this.style.cursor=\'hand\'; this.alt=\'Click here to open new window\\nCTRL
ps视觉冲击感的非主流照片教程本教程使用photoshop 9.0 原图
![[非主流Photoshop教程] Photoshop视觉冲击感的非主流照片教程 [非主流Photoshop教程] Photoshop视觉冲击感的非主流照片教程]() screen.width*0.7) {this.resized=true; this.width=screen.width*0.7; this.style.cursor='hand'; this.;}" src="http://pic.16xx8.com/article/UploadPic/2007/10/26/2007102674410272.jpg" tag.php?name=screen" class="t_tag">
screen.width*0.7) {this.resized=true; this.width=screen.width*0.7; this.style.cursor='hand'; this.;}" src="http://pic.16xx8.com/article/UploadPic/2007/10/26/2007102674410272.jpg" tag.php?name=screen" class="t_tag">
screen.width*0.7) {this.resized=true; this.width=screen.width*0.7; this.alt='Click here to open new window\nCTRL Mouse wheel to zoom in/out';}" border=0>
制作步骤:
1.打开照片(文件-打开)。
2.在通道控制面板选蓝色通道,进入“图象”-“调整”菜单,选“色阶”(或者直接用快捷键“ctrl+l”调出) 在“输入色阶”三栏输入:25、0.75、150,确认。
![[非主流Photoshop教程] Photoshop视觉冲击感的非主流照片教程 [非主流Photoshop教程] Photoshop视觉冲击感的非主流照片教程]() gif');}" src="http://www.52photoshop.com/yeditor/UploadFile/20073893636658.gif" border=0>
gif');}" src="http://www.52photoshop.com/yeditor/UploadFile/20073893636658.gif" border=0>
3.在通道控制面板选绿色通道,进入“图象”-“调整”菜单,选“色阶”(或者直接用快捷键“ctrl+l”调出) 在“输入色阶”三栏输入:40、1.20、220,确认。
![[非主流Photoshop教程] Photoshop视觉冲击感的非主流照片教程 [非主流Photoshop教程] Photoshop视觉冲击感的非主流照片教程](http://www.uibq.com/res/2020/09-14/15/w5sjrflnjpo.gif)
4.在通道控制面板选红色通道,进入“图象”-“调整”菜单,选“色阶”(或者直接用快捷键“ctrl+l”调出)在“输入色阶”三栏输入:50、1.30、255,确认。
![[非主流Photoshop教程] Photoshop视觉冲击感的非主流照片教程 [非主流Photoshop教程] Photoshop视觉冲击感的非主流照片教程](http://www.uibq.com/res/2020/09-14/15/zbr5qxnole1.gif)
5.在通道控制面板选全部rgb通道,进入“图象”-“调整”菜单,选“亮度/对比度” 调整对比度亮度-5,对比度+20,确认。
![[非主流Photoshop教程] Photoshop视觉冲击感的非主流照片教程 [非主流Photoshop教程] Photoshop视觉冲击感的非主流照片教程](http://www.uibq.com/res/2020/09-14/15/4vp0ukdfmld.jpg)
6.在通道控制面板选全部rgb通道,进入“图象”-“调整”菜单,选“色相/饱和度”(或者直接用快捷键“ctrl+u”调出) 调整饱和度+15,确认。这就是最终的效果了,方法是这样的。大家可以根据自己的情况调整。
![[非主流Photoshop教程] Photoshop视觉冲击感的非主流照片教程 [非主流Photoshop教程] Photoshop视觉冲击感的非主流照片教程](http://www.uibq.com/res/2020/09-14/15/m2adeqsxhp0.jpg)
最终完成效果
![[非主流Photoshop教程] Photoshop视觉冲击感的非主流照片教程 [非主流Photoshop教程] Photoshop视觉冲击感的非主流照片教程](http://www.uibq.com/res/2020/09-14/15/c3bpjjuwuop.jpg)
![[非主流Photoshop教程] Photoshop视觉冲击感的非主流照片教程 [非主流Photoshop教程] Photoshop视觉冲击感的非主流照片教程](http://www.uibq.com/res/2020/09-14/15/e3zxo31hvgl.gif)
screen.width*0.7) {this.resized=true; this.width=screen.width*0.7; this.style.cursor='hand'; this.;}" src="http://pic.16xx8.com/article/UploadPic/2007/10/26/2007102674410272.jpg" tag.php?name=screen" class="t_tag">
gif');}" src="http://www.52photoshop.com/yeditor/UploadFile/20073893636658.gif" border=0>
![[非主流Photoshop教程] Photoshop视觉冲击感的非主流照片教程 [非主流Photoshop教程] Photoshop视觉冲击感的非主流照片教程](http://www.uibq.com/res/2020/09-14/15/w5sjrflnjpo.gif)
![[非主流Photoshop教程] Photoshop视觉冲击感的非主流照片教程 [非主流Photoshop教程] Photoshop视觉冲击感的非主流照片教程](http://www.uibq.com/res/2020/09-14/15/zbr5qxnole1.gif)
![[非主流Photoshop教程] Photoshop视觉冲击感的非主流照片教程 [非主流Photoshop教程] Photoshop视觉冲击感的非主流照片教程](http://www.uibq.com/res/2020/09-14/15/4vp0ukdfmld.jpg)
![[非主流Photoshop教程] Photoshop视觉冲击感的非主流照片教程 [非主流Photoshop教程] Photoshop视觉冲击感的非主流照片教程](http://www.uibq.com/res/2020/09-14/15/m2adeqsxhp0.jpg)
![[非主流Photoshop教程] Photoshop视觉冲击感的非主流照片教程 [非主流Photoshop教程] Photoshop视觉冲击感的非主流照片教程](http://www.uibq.com/res/2020/09-14/15/c3bpjjuwuop.jpg)
![[非主流Photoshop教程] Photoshop视觉冲击感的非主流照片教程 [非主流Photoshop教程] Photoshop视觉冲击感的非主流照片教程](http://www.uibq.com/res/2020/09-14/15/e3zxo31hvgl.gif)


 加载中,请稍侯......
精彩评论